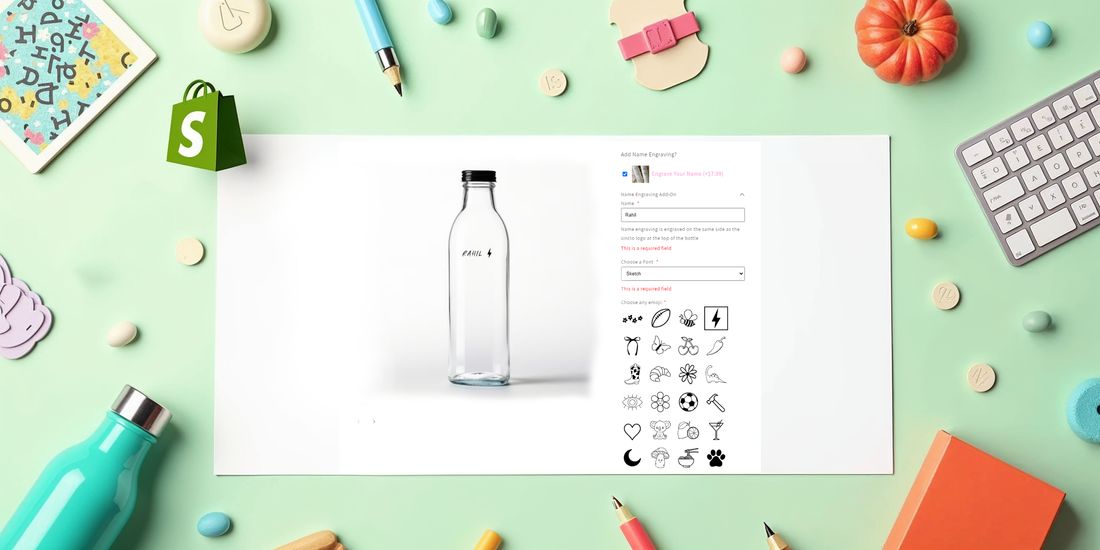
How to Add a Custom Text Field to Your Shopify Product Page

Hey there, Shopify store owners! Ready to spice up your product pages with some personalization? Let's talk about how to add a custom text field to your shopify product page. It's a game-changer that'll have your customers feeling like VIPs.
Why Bother with Custom Text Fields?
Think about it. You're browsing online, and suddenly you can add your name to that sleek water bottle or write a heartfelt message on a gift. That's the magic of custom text fields. They transform ordinary products into one-of-a-kind treasures.
But it's not just about warm fuzzies. Custom fields can boost your sales, help you stand out from the crowd, and give you valuable insights into what your customers want. Win-win-win!
5 Step-by-Step Guide for How to Add a Custom Text Field to Your Shopify Product Page
1. Create a Metafield Definition
First, we need to define our custom text field in Shopify's admin:
- Go to Settings > Custom data > Products
- Click "Add definition"
- Set up your metafield:
- Name: "Custom Text Field"
- Namespace and key: my_fields.custom_text
- Description: "Enter custom text for product personalization"
- Type: Single line text
- Save the definition
2. Add the Metafield to Products
Once defined, you can add this metafield to individual products:
- Go to Products > [Select a product]
- Scroll down to "Metafields"
- Find your "Custom Text Field" and enter a default value if desired
3. Display the Metafield on the Product Page
To display the metafield on your product page, you'll need to modify your theme. Here's how:
- Go to Online Store > Themes
- Click "Actions" > "Edit code" on your current theme
- Open the product-template.liquid file
-
Add the following code where you want the custom text field to appear:
{% if product.metafields.my_fields.custom_text %}
<div class="product-form__input">
<label for="custom-text">{{ product.metafields.my_fields.custom_text.label }}</label>
<input type="text" id="custom-text" name="properties[Custom Text]" value="{{ product.metafields.my_fields.custom_text.value }}"/>
</div>
{% endif %}
-
Save your changes
4. Make the Field Editable by Customers
To allow customers to edit the field, we need to modify our code slightly:
{% if product.metafields.my_fields.custom_text %}
<div class="product-form__input">
<label for="custom-text">{{ product.metafields.my_fields.custom_text.label }}</label>
<input type="text" id="custom-text" name="properties[Custom Text]" placeholder="{{ product.metafields.my_fields.custom_text.value }}"/>
</div>
{% endif %}
This code uses the metafield value as a placeholder, allowing customers to enter their own text.
5. Handling the Custom Text in Orders
When an order is placed, the custom text will be saved as a line item property. You can view this in the order details in your Shopify admin.
Advanced Metafield Techniques
Conditional Display
You can use metafields to conditionally display the custom text field:
{% if product.metafields.my_fields.show_custom_field == 'true' %}
<!-- Custom text field code here -->
{% endif %}
Multiple Custom Fields
You can create multiple metafields for different types of customization:
{% if product.metafields.my_fields.custom_text_1 %}
<!-- First custom text field -->
{% endif %}
{% if product.metafields.my_fields.custom_text_2 %}
<!-- Second custom text field -->
{% endif %}
Validation and Character Limits
To add validation, you'll need to use some JavaScript. Here's a basic example:
<script>
document.getElementById('custom-text').addEventListener('input', function() {
var maxLength = {{ product.metafields.my_fields.max_length | default: 50 }};
if (this.value.length > maxLength) {
this.value = this.value.slice(0, maxLength);
}
});
</script>
Best Practices: Making Your Custom Fields Shine
- Keep it simple: Don't overwhelm your customers with too many options.
- Be clear: Use labels that explain exactly what you want customers to input.
- Test, test, test: Make sure your fields work on all devices.
- Show it off: Display the custom text in the cart and checkout to remind customers of their personalization.
Advanced Tricks for the Overachievers
Want to take your custom fields to the next level? Try these:
- Conditional logic: Show or hide fields based on other selections.
- Validation: Make sure customers are entering the right kind of info.
- Multi-step customization: Guide customers through a personalization journey.
Troubleshooting: When Things Go Sideways
Running into issues? Don't panic! Here are some common problems and quick fixes:
- Theme compatibility: Some themes play nicer with custom fields than others. If you're stuck, reach out to your theme developer.
- App conflicts: Too many cooks in the kitchen? Try disabling other apps to see if that helps.
- Special characters causing havoc: Make sure your code can handle all sorts of inputs.
Real-World Success Stories
Let's look at some folks who've knocked it out of the park with custom fields:
- Sarah's Sparkles: Added a custom engraving option to their jewelry line and saw a 30% increase in average order value.
- Paw-fect Pets: Allowed customers to add their pet's name to products, leading to a flood of social media shares and a boost in organic traffic.
Wrapping It Up
Adding custom text fields to your Shopify product pages isn't just a neat trick – it's a powerful tool for connecting with your customers and boosting your bottom line. Whether you're a coding pro or prefer drag-and-drop simplicity, there's a method that'll work for you.
So, what are you waiting for? Give your customers the gift of personalization and watch your Shopify store thrive!
P.S. Don't forget to mark this as an accepted solution if it helped you out. And if you've got any questions or cool customization stories, drop them in the comments. Let's learn from each other!
Share via


